[FIRMWARE] Itus Shield v2
Posted by Grommish on May 12, 2020; 8:02pm
URL: https://itus.accessinnov.com/FIRMWARE-Itus-Shield-v2-tp2014.html
Below are the instruction for flashing the firmware on your Itus Networks Shield.
*** Disclaimer: I am not affliated, endorsed, or recognized by anyone who was associated with Itus Networks. This is a derived work of OpenWrt and released under GNU GPL 2.0. While I will always do my utmost to ensure the safety of the device, any liability risk of damage is yours, and yours alone.
That being said, most of the Shield users probably aren't actually using it.
Requirements:
A working Itus Networks Shield, with at least the ability and knowledge of how to ssh/scp
A USB console rollover cable would be ideal. (8N1 115200 8N1 Hardware/Software Flow Control OFF)
If your shield isn't working at all, follow How to unbrick your Shield and get it at least working at that level, then come back.
Background:
The Shield was originally shipped with 3 modes and 4 eMMC partitions. Bridge, Router, Gateway modes available via front-position GPIO selector. This image will alter the Gateway mode, image, and partition. I used this slot because the original Shield Gateway image was reportedly non-functional anyway. This will NOT alter your BRIDGE/ROUTER images or settings.
Flashing:
Boot the Shield into any mode that you can access it via ssh/scp (Router mode, by default, is the easiest, and I am going to make the assumption it is being used)
Download the ItusgatewayImage
Now, we need to mount the storage partition on the Shield.
On the device:
umount /overlay
Note: The umount /overlay SHOULD return "umount: can't unmount /overlay: Invalid argument". This is a sanity check to make sure /overlay isn't pointing elsewhere
This will make a backup copy of your existing (stock) Gateway image..
For Linux shell users, you can just cut/paste the following:
Copying the new image:
Now we need to copy the ItusgatewayImage to the device. Go to the directory you downloaded ItusgatewayImage and scp the file to the device in the /overlay directory.
Shell users:
Yay! Your done. Make sure your Front Panel Switch is in the RIGHT (G) selection and reboot.
If you have a console cable, you can watch the actual installation on boot.
Boot is complete when the (M) light on the front of the Shield turns ORANGE.
Tech Notes: The Image looks for a keystone file ( /.norwits) on init. If it doesn't find it, it deletes everything in the partition and copies the internals of the image file over. On a side note, this allows us to make use of the internal wear-leveling for the eMMC chips, so "flashing" like most routers shouldn't degrade the storage as fast. This also means you can always remove /.norwits from the partition and "reset" the device.. More of this later.
At this point, eth0 is the WAN interface, eth1/eth2 are the LAN interfaces. Connect eth0 to you internal router, and your PC to eth1/2, and your PC should be assigned a 10.10.10.x IP address and you should be online.
enp7s0: flags=4163<UP,BROADCAST,RUNNING,MULTICAST> mtu 1500
You should be able to browse to http://10.10.10.10 and log into luCi.
URL: https://itus.accessinnov.com/FIRMWARE-Itus-Shield-v2-tp2014.html
Below are the instruction for flashing the firmware on your Itus Networks Shield.
*** Disclaimer: I am not affliated, endorsed, or recognized by anyone who was associated with Itus Networks. This is a derived work of OpenWrt and released under GNU GPL 2.0. While I will always do my utmost to ensure the safety of the device, any liability risk of damage is yours, and yours alone.
That being said, most of the Shield users probably aren't actually using it.
Requirements:
A working Itus Networks Shield, with at least the ability and knowledge of how to ssh/scp
A USB console rollover cable would be ideal. (8N1 115200 8N1 Hardware/Software Flow Control OFF)
If your shield isn't working at all, follow How to unbrick your Shield and get it at least working at that level, then come back.
Background:
The Shield was originally shipped with 3 modes and 4 eMMC partitions. Bridge, Router, Gateway modes available via front-position GPIO selector. This image will alter the Gateway mode, image, and partition. I used this slot because the original Shield Gateway image was reportedly non-functional anyway. This will NOT alter your BRIDGE/ROUTER images or settings.
Flashing:
Boot the Shield into any mode that you can access it via ssh/scp (Router mode, by default, is the easiest, and I am going to make the assumption it is being used)
Download the ItusgatewayImage
Now, we need to mount the storage partition on the Shield.
On the device:
umount /overlay
mount /dev/mmcblk0p1 /overlay
cp /overlay/ItusgatewayImage /overlay/ItusgatewayImage-bak
Note: The umount /overlay SHOULD return "umount: can't unmount /overlay: Invalid argument". This is a sanity check to make sure /overlay isn't pointing elsewhere
This will make a backup copy of your existing (stock) Gateway image..
For Linux shell users, you can just cut/paste the following:
ssh -q -o StrictHostKeyChecking=no -o UserKnownHostsFile=/dev/null root@10.10.10.10 "umount /overlay; mount /dev/mmcblk0p1 /overlay && cp /overlay/ItusgatewayImage /overlay/ItusgatewayImage-bak"
Copying the new image:
Now we need to copy the ItusgatewayImage to the device. Go to the directory you downloaded ItusgatewayImage and scp the file to the device in the /overlay directory.
Shell users:
scp -o StrictHostKeyChecking=no -o UserKnownHostsFile=/dev/null root@10.10.10.10 ItusgatewayImage root@10.10.10.10:/overlay
Yay! Your done. Make sure your Front Panel Switch is in the RIGHT (G) selection and reboot.
If you have a console cable, you can watch the actual installation on boot.
Boot is complete when the (M) light on the front of the Shield turns ORANGE.
Tech Notes: The Image looks for a keystone file ( /.norwits) on init. If it doesn't find it, it deletes everything in the partition and copies the internals of the image file over. On a side note, this allows us to make use of the internal wear-leveling for the eMMC chips, so "flashing" like most routers shouldn't degrade the storage as fast. This also means you can always remove /.norwits from the partition and "reset" the device.. More of this later.
At this point, eth0 is the WAN interface, eth1/eth2 are the LAN interfaces. Connect eth0 to you internal router, and your PC to eth1/2, and your PC should be assigned a 10.10.10.x IP address and you should be online.
enp7s0: flags=4163<UP,BROADCAST,RUNNING,MULTICAST> mtu 1500
inet 10.10.10.201 netmask 255.255.255.0 broadcast 10.10.10.255
inet6 fd18:640:804c:0:9ce:f97e:dc6f:753d prefixlen 64 scopeid 0x0<global>
inet6 fe80::5ac2:4118:9a97:7ccb prefixlen 64 scopeid 0x20<link>
inet6 fd18:640:804c:0:5f9d:bd6b:93fe:db02 prefixlen 64 scopeid 0x0<global>
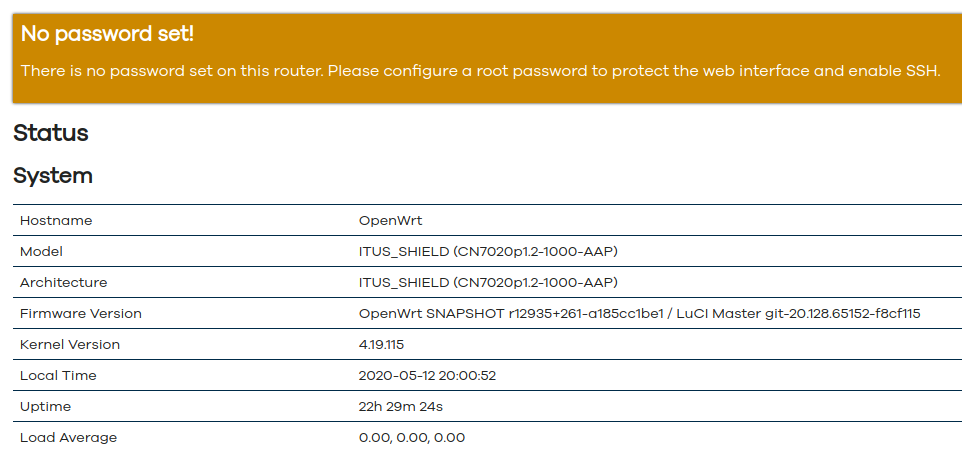
You should be able to browse to http://10.10.10.10 and log into luCi.
Running Itus Shield v2 Firmware
| Free forum by Nabble | Edit this page |